
Table of Contents
Are you tired of spending hours scrubbing and cleaning your floor tile grout, only to have it look dull and dirty again within days? We feel your pain! But fear not, dear reader, for we have the ultimate solution to help you maintain that sparkling clean grout for longer. This comprehensive guide will walk you through all the steps to seal floor tile grout after cleaning – ensuring a long-lasting sparkle that will leave your guests in awe. So, grab your mop and get ready to unlock the secret to flawless floors!
Why is It Important to Seal Floor Tile Grout after Cleaning?
Sealing floor tile grout after cleaning ensures that dirt, dust, and other contaminants will not accumulate over time. This will help to keep the floor looking clean and new-looking. Additionally, sealing the grout will help to prevent moisture from seeping into the subflooring, which can lead to corrosion and deterioration.
Tools and Materials Needed for Sealing Floor Tile Grout
You’ll need a cleaning cloth, a brush, vinegar or hydrogen peroxide, a bucket, work gloves, and floor tile sealer to seal the grout in your floor tiles.
To clean the tile: Squeeze some of the cleaning fluid onto the cloth and scrub the dirty surface with circular motions. Rinse off the area with clear water.
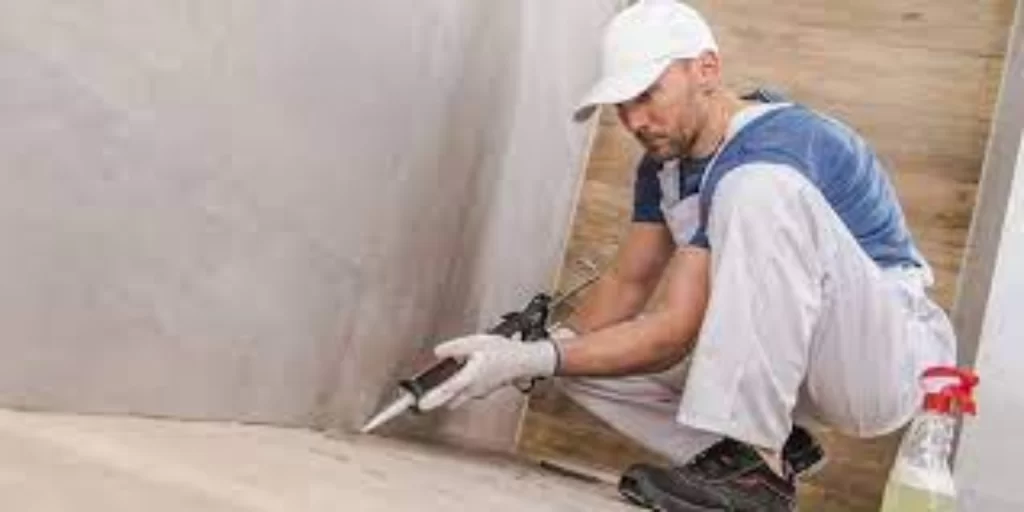
To repair cracks or chips in the tile, Apply a thin layer of sealer to one edge of the chip. Place another piece of clean tile over the top and press down firmly with your hand. Let dry for 30 minutes. Repeat this process on all sides of the crack or chip.
Step-by-Step Guide on Sealing Floor Tile Grout

If you want to seal your floor tile grout, following these steps should help.
1. Clean the grout surface with a white vinegar and water solution. Make sure to get into all the crevices and cracks.
2. Apply a layer of bonding promoter to the grout surface. This will help the sealant stick well to the grout.
3. Mix a sealant according to package instructions and apply it to the wet grout surface using a sponge or applicator pad. Be sure to cover all of the surface area!
4. Allow the sealant to dry for at least two hours before walking on or cleaning it up.
Tips for Achieving the Best Results When Sealing Floor Tile Grout

Sealant is a crucial ingredient when it comes to sealing floor tile grout. If the sealant bond is too weak, water can seep through the grout and cause damage. Follow these tips for achieving the best results when sealing floor tile grout:
1. Choose the proper sealant. Three types of glues can be used: acrylic, silicone, or polyurethane. Acrylic adhesives are the cheapest and most readily available but have a weaker bond than silicone or polyurethane sealants. Silicone and polyurethane sealants have a stronger glue but are more expensive.
2. Apply sealant to the surface of the grout lines. Use a putty knife to spread the glue evenly over the surface of the lines. Make sure to get into all nooks and crannies.
3. Let the sealant dry completely before using your floor again. Once dry, any residue that may have formed can be removed with a scrub brush or clay bar.
Common Mistakes to Avoid When Sealing Floor Tile Grout
If you’re like most homeowners, you probably sweep the floor and vacuum it before applying sealer or finishes. However, there are a few things to keep in mind if you are selling floor tile grout:
-Wipe down all surfaces to be sealed with a damp cloth first. This will help dissipate dust or debris that may cause staining or peeling later.
-Do use solvents or harsh chemicals when cleaning the floor–these can damage the sealer or finish.
-Apply sealer evenly over the surface to be sealed. Use a wand or small roller to cover as much surface area as possible. The more even the coating, the better. Allow the sealer to dry for at least 24 hours before walking on it.
-If any cracks or chips appear in your sealer after it’s dried, apply a new coat of sealer immediately and patch any holes with a piece of fiberglass mesh cut to fit.
How often should you Seal Floor Tile Grout?

Floor tile grout is a sealed surface that needs to be treated differently than other flooring. It requires sealing every 6-12 months to prevent dirt, dust, and other particles from entering the tile and causing damage. One way to fill the grout is with a grout sealer. Other methods include:
- Using a vacuum cleaner with a crevice tool removes any excess dirt or debris.
- A water rinse followed by an air dry.
- Using a granular high-performing sealer like Kilz.
Alternative Methods for Sealing Floor Tile Grout
There are a few alternative methods for sealing floor tile grout after cleaning.
One option is to use a product called Seal-A-Floor. This liquid sealant is available in many stores and can fill in any cracks or holes in the grout and seal it in place. Pour the Seal-A-Floor into the cracks and then use a plunger or broom to push it into the grout until it is completely covered. Let the product dry before walking on it.
Another option is to use caulk. Patch any gaps or cracks in the grout with a caulk tube, and press the caulk firmly into the crevices. Allow the caulk to dry before walking on it.
Recommended Products for Sealing Floor Tile Grout
If you’ve just cleaned and sealed the floor tiles with grout sealant, your job is done! But, if pesky dirt and debris are hiding in the crevices of the grout, or if the tile edges are starting to lift and peel, you may need to do more work. Follow these simple tips for sealing floor tile grout that will keep your floors looking great for years.
Add an Epoxy Sealant: If stubborn dirt, dust, or debris remains after cleaning and sealing the tiles, an epoxy sealant may be necessary. This sealant will stick to the tile surface and any dirt or debris falling into the cracks. Just apply a small amount of epoxy in each attempt to cover all the loose material. Allow the epoxy to dry completely before grouting again.
Apply Grout Coatings: If you want even more excellent durability for your newly sealed flooring, consider using one of our grout coatings. These unique formulations will resist staining and fading over time, ensuring your floors look great for years. Remember to apply a coat of sealant first to form a barrier between the coating and the tile surface.
Usetile Protector: One final step for added protection against staining and fading is to use a Tile Protector. This innovative product coats entire surfaces with a sealant that protects against spills, coffee, tea, and other common household contaminants. Just make sure to wipe down all distractions off of the tiles before applying the protector.
Conclusion: How to Seal Floor Tile Grout after Cleaning
One of the benefits of using a sealer on your floor tile grout is that it will protect the grout from staining and fading. There are a few different types of sealers that you can use, so it’s essential to read the instructions before you start.
If you have a latex or silicone-based sealer, clean the area well before applying it. You can also use a cleaner specifically designed for this purpose if you don’t have either. If you have a water-based sealer, rinse the area well before applying. Lastly, if you use an oil-based or paint-based sealer, wait at least 24 hours after cleaning before sealing.
